How To Add A Plan
Once you’ve reviewed our Bible Plan Basics, you’re ready to upload a Plan! The Partner Portal is where you’ll add and submit your Bible Plan. Intuitive navigation will help you know what elements your Plan needs and where to put them.
There are two places to add a Plan:
The (+) icon to the right of the Plans tab in the sidebar menu or the (+ Add a Plan) button next to My Bible Plans on the Portal Homepage.

Step 1 - Add Your Plan Info
- Fill in all the required fields on the Add a Bible Plan page:
- Plan Language
- Plan Name
- Plan Description
- Plan Images (1440x810 and 320x320)
- Target Launch Date
- Three Plan Categories
- Five Plan KeywordsWhen adding keywords, press “enter” on the keyboard, then select Save.
- Partner Website/URL
- Plan Length
- When you’re finished, click Save.
Step 2 - Add Your Plan Content


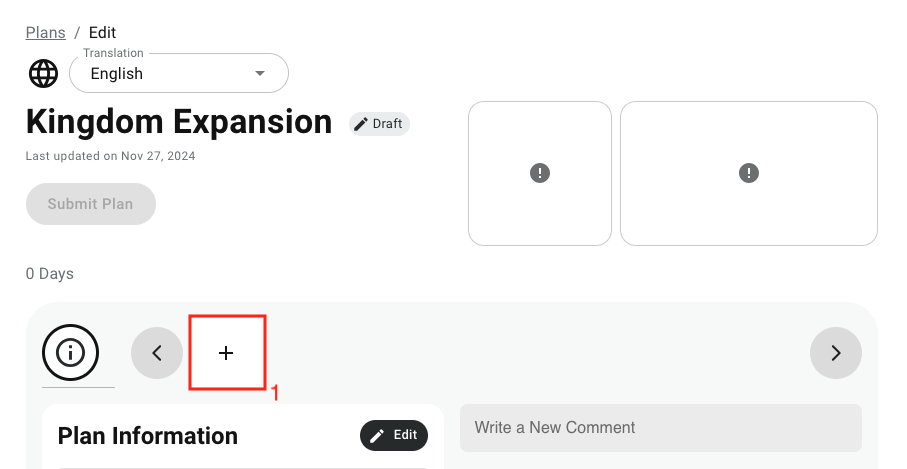
- Click the button beside the Plan Info section that says (+ New Day).
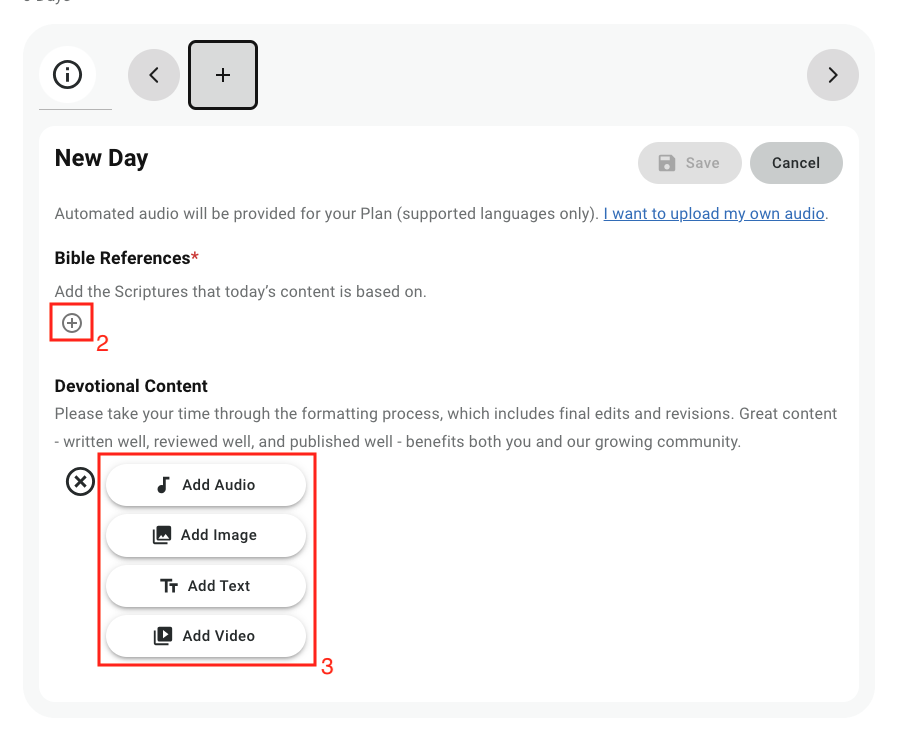
- Select Bible reference(s) for your Plan day (required for every day of a Plan).
- A plan can have multiple modules of content within a Plan day. Choose one of the available modules (Text, Video, Audio, or Image) to insert a block of content, as seen below. Follow the instructions in each specific module to enter text or upload images, video, or audio.
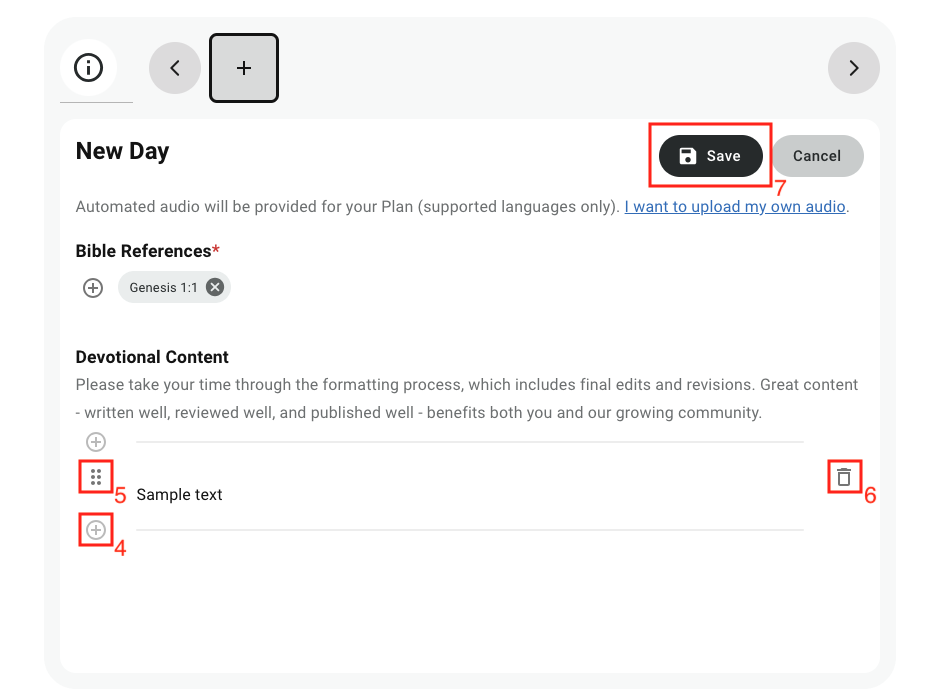
- After inserting one block of content, if you want to enter another block, move your mouse under the current block and click the “+” sign.
- Blocks can also be reordered. To move a block, click the “dots” (circled in red below) and drag the module to its new location.
- Want to delete a block? Hover over the block and click the “trash can” icon.
- When your Plan Day is how you want it, click Save. Repeat the steps for each day you’d like to add to the Plan.
Step 3 - Add Attribution
Published by More than One Organization?
If your Plan is published by more than one organization, add all the organizations in this section. You’ll need to already be added to each organization on the Partner Plans Portal. Ask someone with the Owner role to add you, or contact the Support Team.
When someone selects your Plan on the Bible App or Bible.com to view its details, the publisher information appears on the Plan details page or screen. If your Plan has a co-publisher, their name will not appear on this page or screen. However, the Plan will appear on both your organization’s and your co-publisher’s pages in the Bible App, and both of you will have access to the Plan’s data on YouVersion Connect.
Unless you specify otherwise (by leaving a comment on the Plan during submission), the Plan will always point to your organization, as the one that submitted it.
About this Publisher URL
If the Plan website differs from your organization’s main website, add the URL here. This helps readers visit your organization when viewing the Plan’s details. If left blank, your existing Publisher website will be used by default.
Step 4 - Submit Your Plan
Make sure your content is properly edited, free of errors, and adheres to our Bible Plan Basics.
Once you’ve added and proofread all of your Plan content, refresh the page. Click the “Submit Plan” button under the Plan Title.
Step 5 - Choose Desired Launch Date
Select a launch date for the Plan—ideally at least four weeks in advance and aligned with the publishing calendar. Then click Next.