ロケーションを追加

教会が複数のロケーションで集会を行っている場合、プロフィールにロケーションを追加できます。
プロフィールに追加の教会ロケーションを追加していない場合、アプリで教会が検索されたときに検索結果には親組織のみが表示されます。' 新しいロケーションを追加すると、親組織と新しいロケーションの両方が検索結果に表示されます。 重複エントリを避けるため、親組織用の新しいロケーションは追加しないでください。 親組織を他のロケーションと区別するには、 アドレスを非表示にします。
教会ロケーションの追加方法
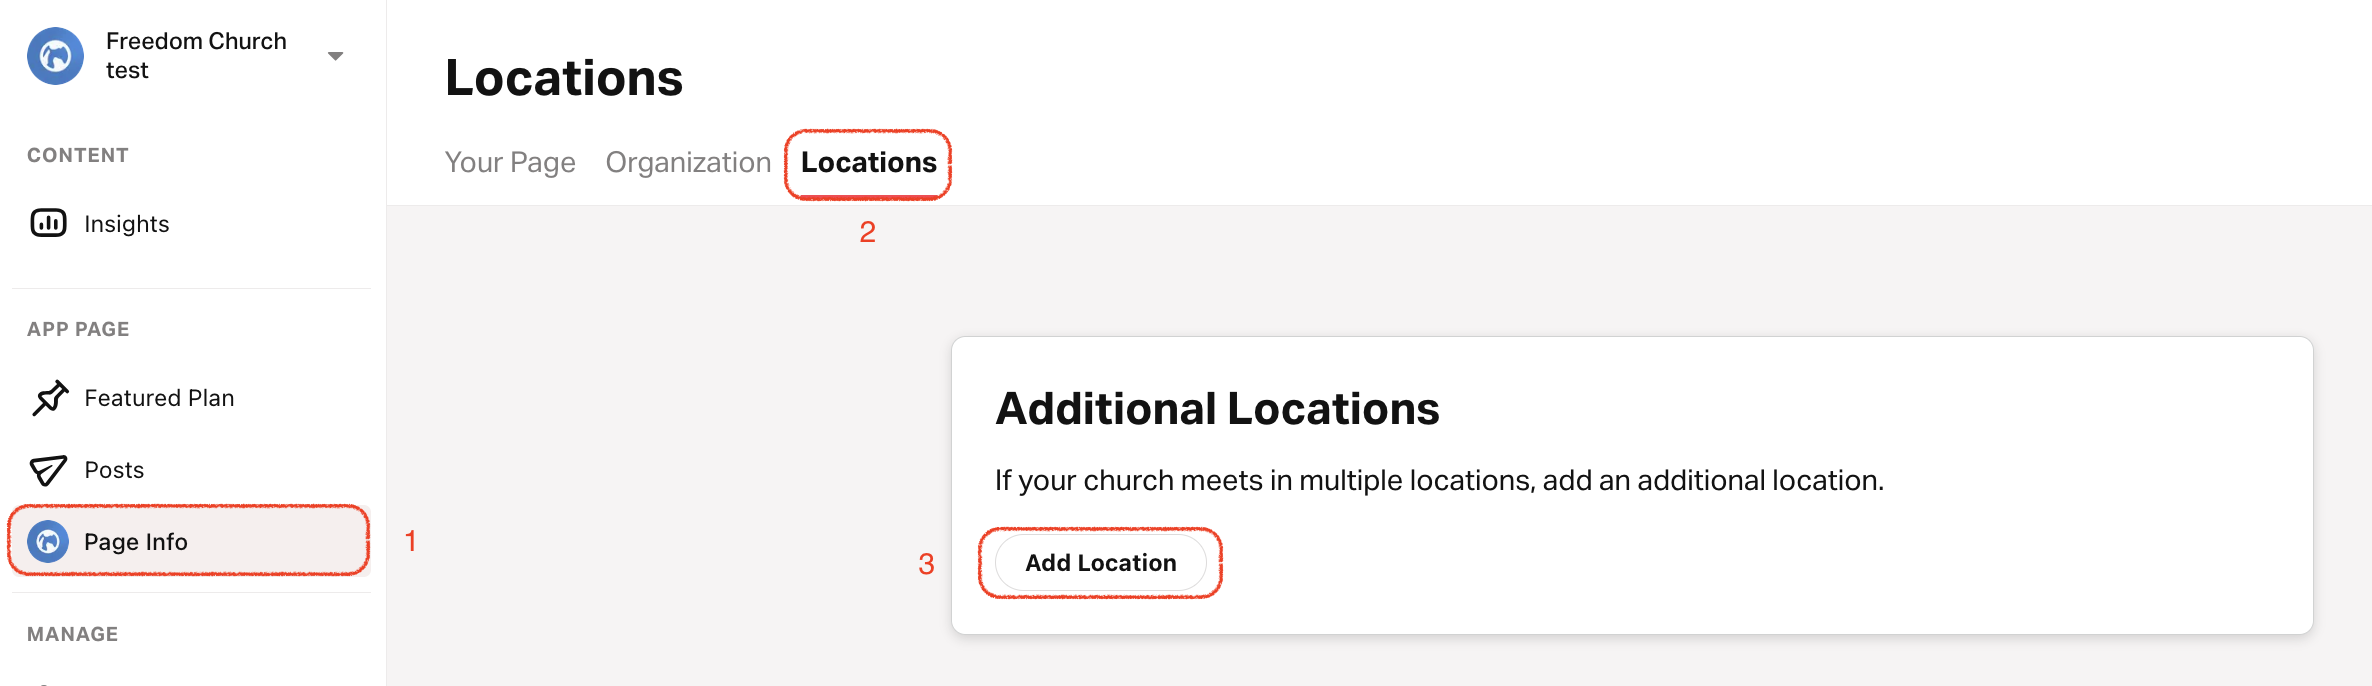
- プロフィール タブをタップします。
- 上部メニューで ロケーション を選択します。
- 一番下までスクロールして ロケーションを追加をタップします。
- ロケーション名を入力します。
- カスタムロケーションロゴをアップロードし、背景色を選択します。カスタムロケーションロゴまたは背景色がない場合、アプリはデフォルトでプライマリ教会ロゴと色を使用します。
- 物理的な集会場所の住所を追加し、タイムゾーンを選択します。
- ロケーションリーダー'の名前、役職、カスタム画像を追加します。
- このロケーションの簡単な説明を記入します。
- オプション: このロケーション'に固有のウェブサイト、電話番号、メールアドレスを追加します。
- このロケーションの主要言語を選択します。
- このロケーションのスケジュールを追加 します。
親組織の住所を表示/非表示
- プロフィール タブをタップします。
- Your Pageを選択します。
- 右上:鉛筆アイコンをタップします。
- 住所 セクションまでスクロールし、 公開ページに住所を表示 を選択または選択解除して住所を表示または非表示にします。