Add Location

You can add locations to your Profile if your church meets in multiple locations.
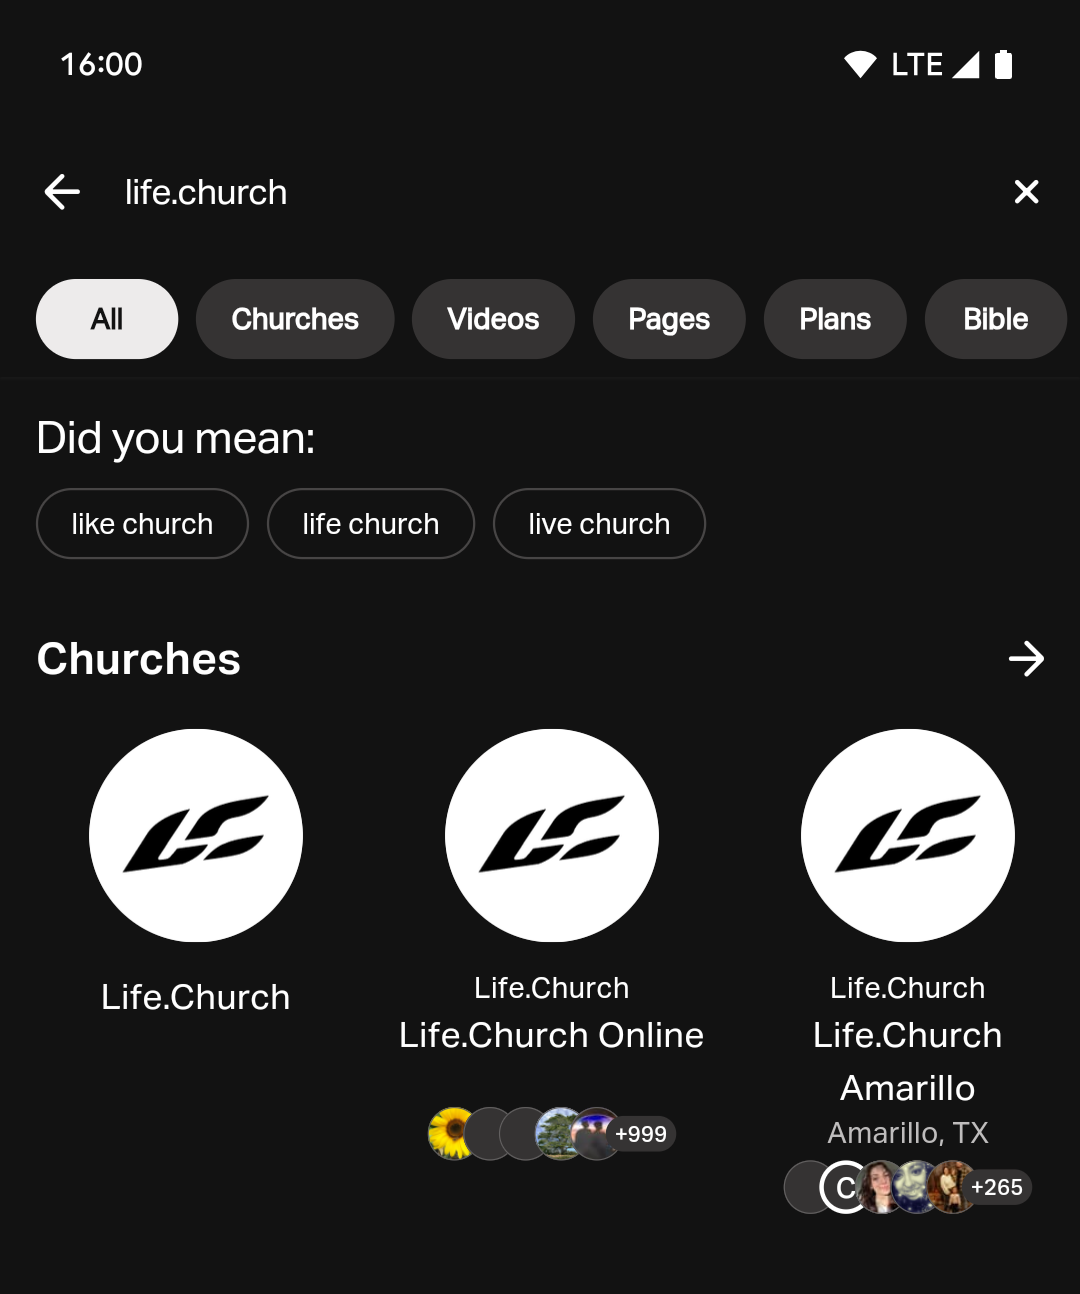
How Church Locations Appear in Search Results
When you first sign up your church, your initial location also serves as the main organization.
If you add a new location:
- The system creates a parent organization plus entries for each location.
- Your original location keeps its ID; the new location gets a new ID.
- The parent organization and each location will appear in Bible App search results and can be renamed independently.
If you delete a location and only one remains, that location automatically becomes the new parent organization.
To avoid duplicate entries, do not add your main church as a new location.
How To Add Church Locations
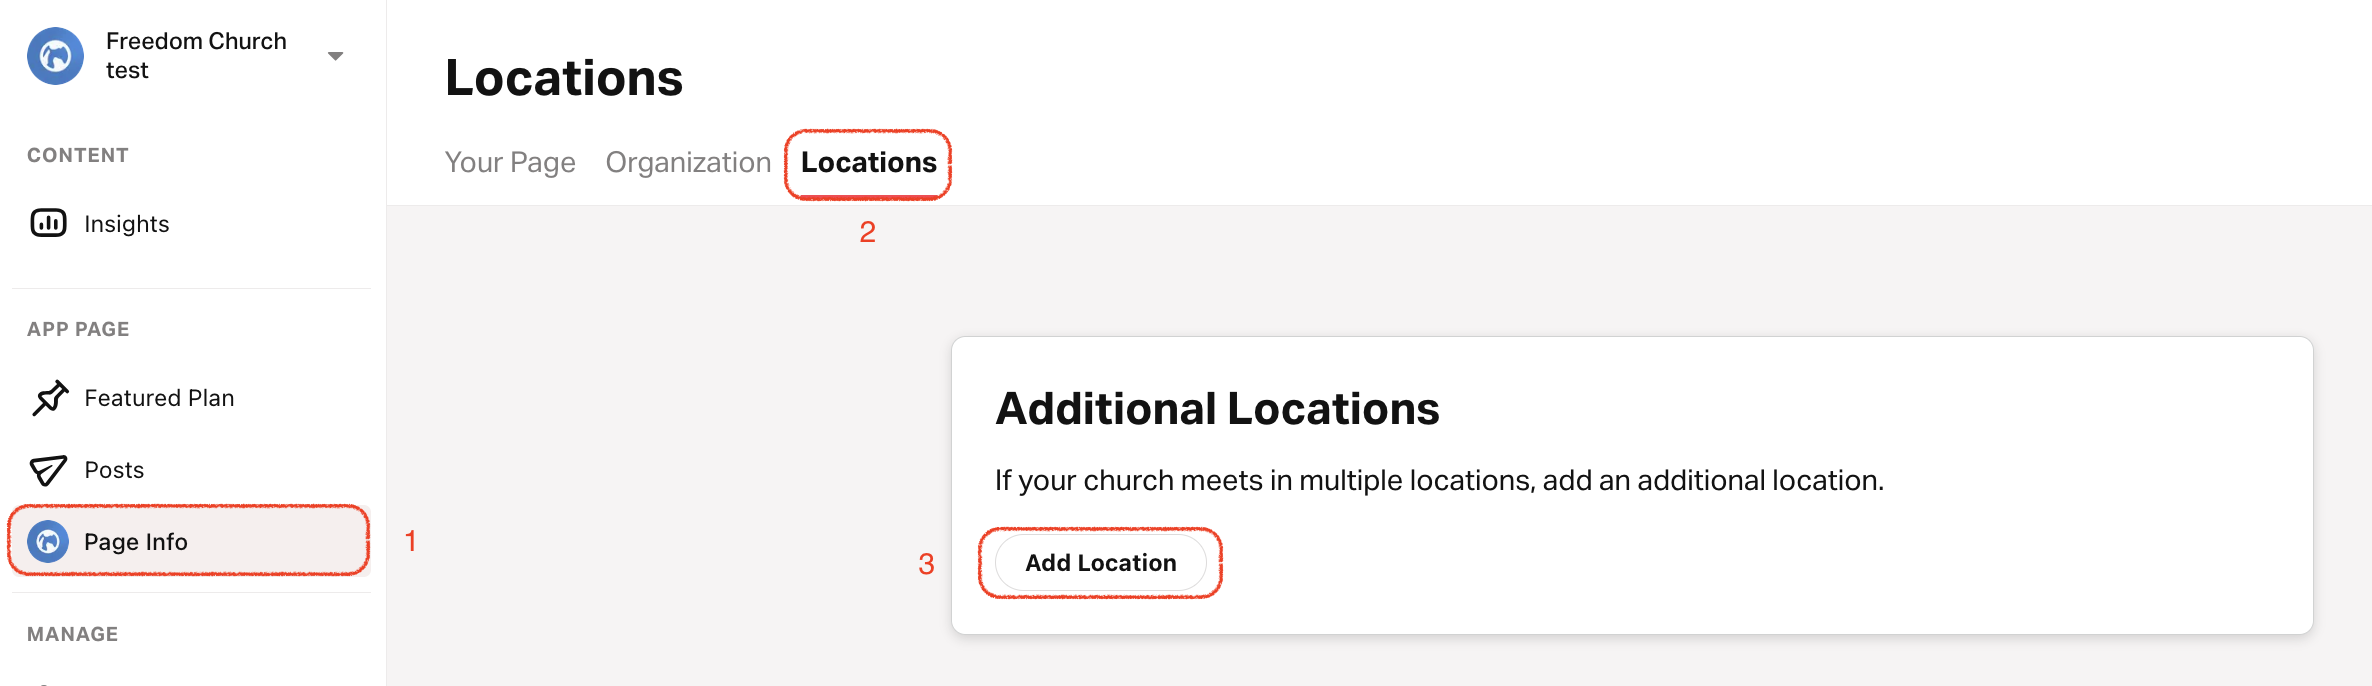
- Tap on the Profile tab.
- Select Locations on the top menu.
- Scroll to the bottom and tap Add Location.
- Enter the location name.
- Upload a custom location logo and select a background color.Without a custom location logo or background color, the app will default to your primary church logo and color.
- Add the physical meeting address and select a timezone.
- Add the location leader's name, title, and a custom image.
- Write a short description of this location.
- Optional: Add a website, phone, and email that's specific to this location.
- Choose the primary language for this location.
- Add a schedule for this location.
Show/Hide Parent Organization Address
- Tap on the Profile tab.
- Select Your Page.
- Top right: Tap on the pencil icon.
- Scroll down to the Address section and select or deselect Show address on public Page to show or hide the address.